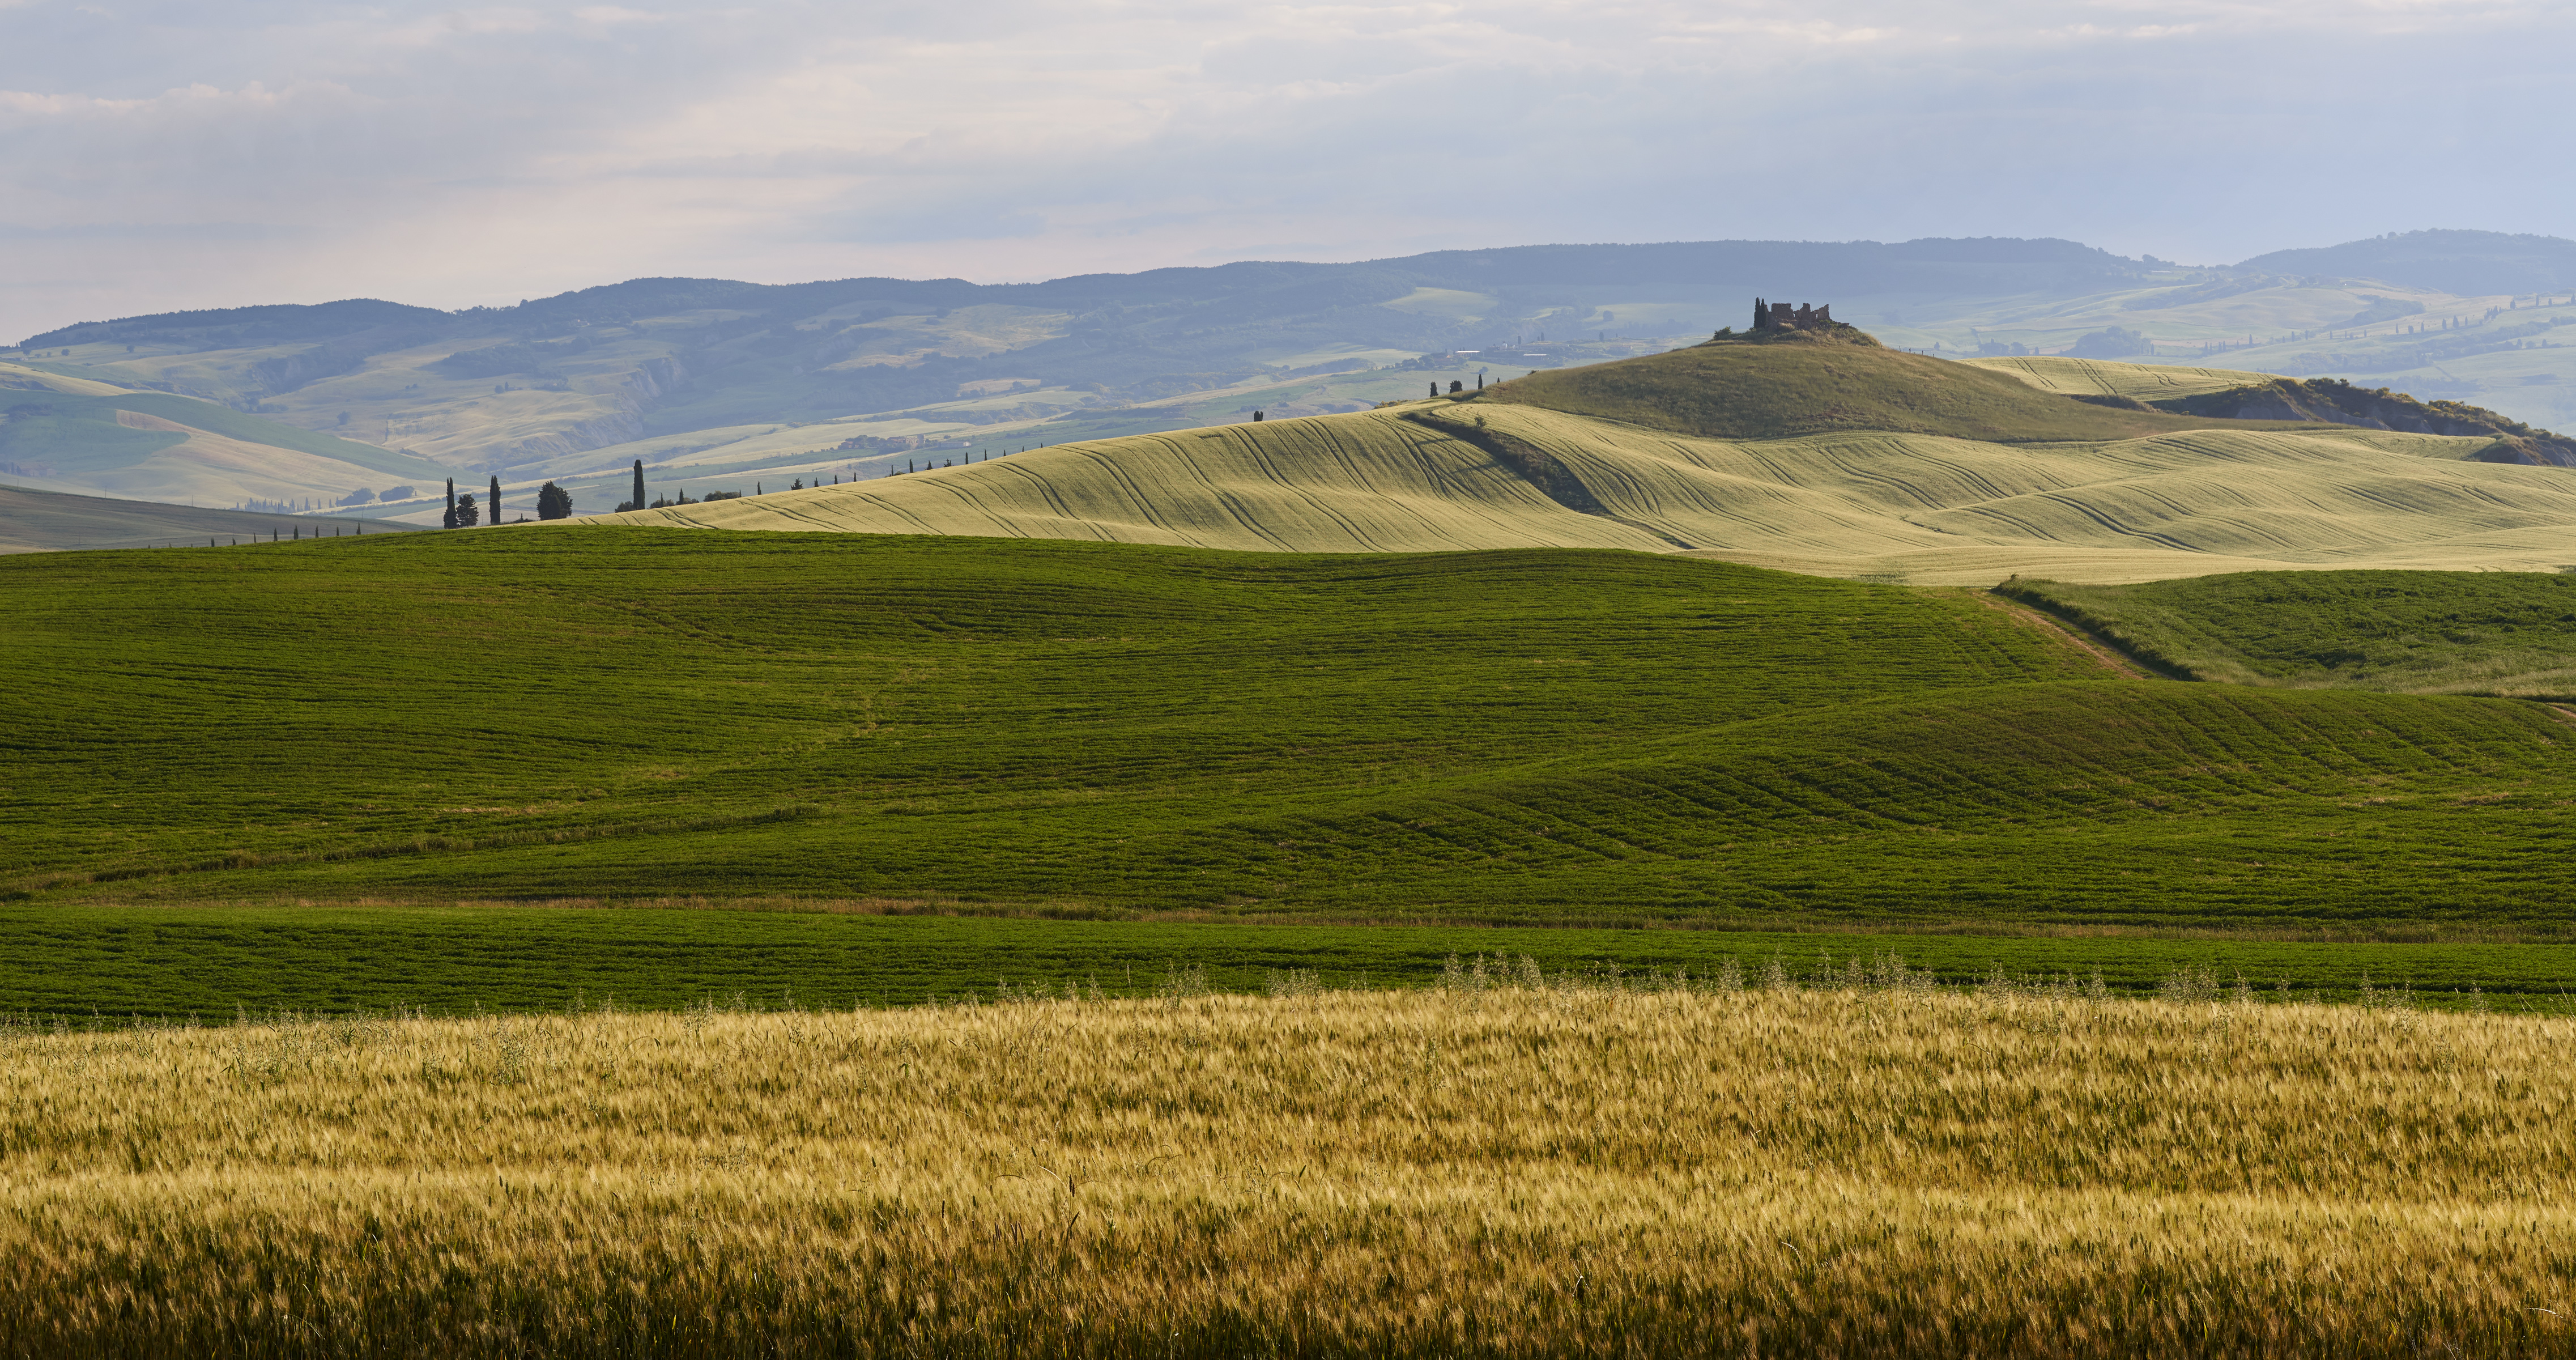
Focus stacking, also known as z stacking or depth of field blending, is a technique that combines multiple images focused at different planes, to obtain a greater depth of field. This is particularly useful in situations where the scene has a large range of depths in the subject space compared to the shallow depth of field obtained for a given sensor size, focal length, and aperture combination. This is often so in macro, landscape, and architectural work.
It is important to recall that for every single, non-stacked, image there is one (and only one) plane in the subject space at which the image points on the sensor are exactly sharp, that is, point like. Any point of a subject in another plane will be imaged as a disk, know as the blur spot. If this disk is sufficiently small for a given magnification and viewing distance, it will be indistinguishable from a point. The diameter of a sufficiently small blur spot is known as the acceptable circle of confusion. The acceptable sharpness between two planes on either side of the focal plane is known as the depth of field (DoF). These planes are always at right angles to the sensor plane unless we explore view cameras or use tilt/shift lenses on DSLRs.
Depth of field can be increased by stopping down the aperture (larger f-number), but beyond a certain point, diffraction counteracts the benefit of reducing lens aberrations and of bringing the scene into focus. This happens relatively early (f/5.6) for high resolution full-frame cameras. The theory and practice of obtaining maximum depth-of-field in a photograph is complex and would be a good subject for a future post, in particular when it comes to the medium format look. A scientific paper by Jeff Conrad on this subject (albeit aimed at the large-format shooter) can be downloaded here.
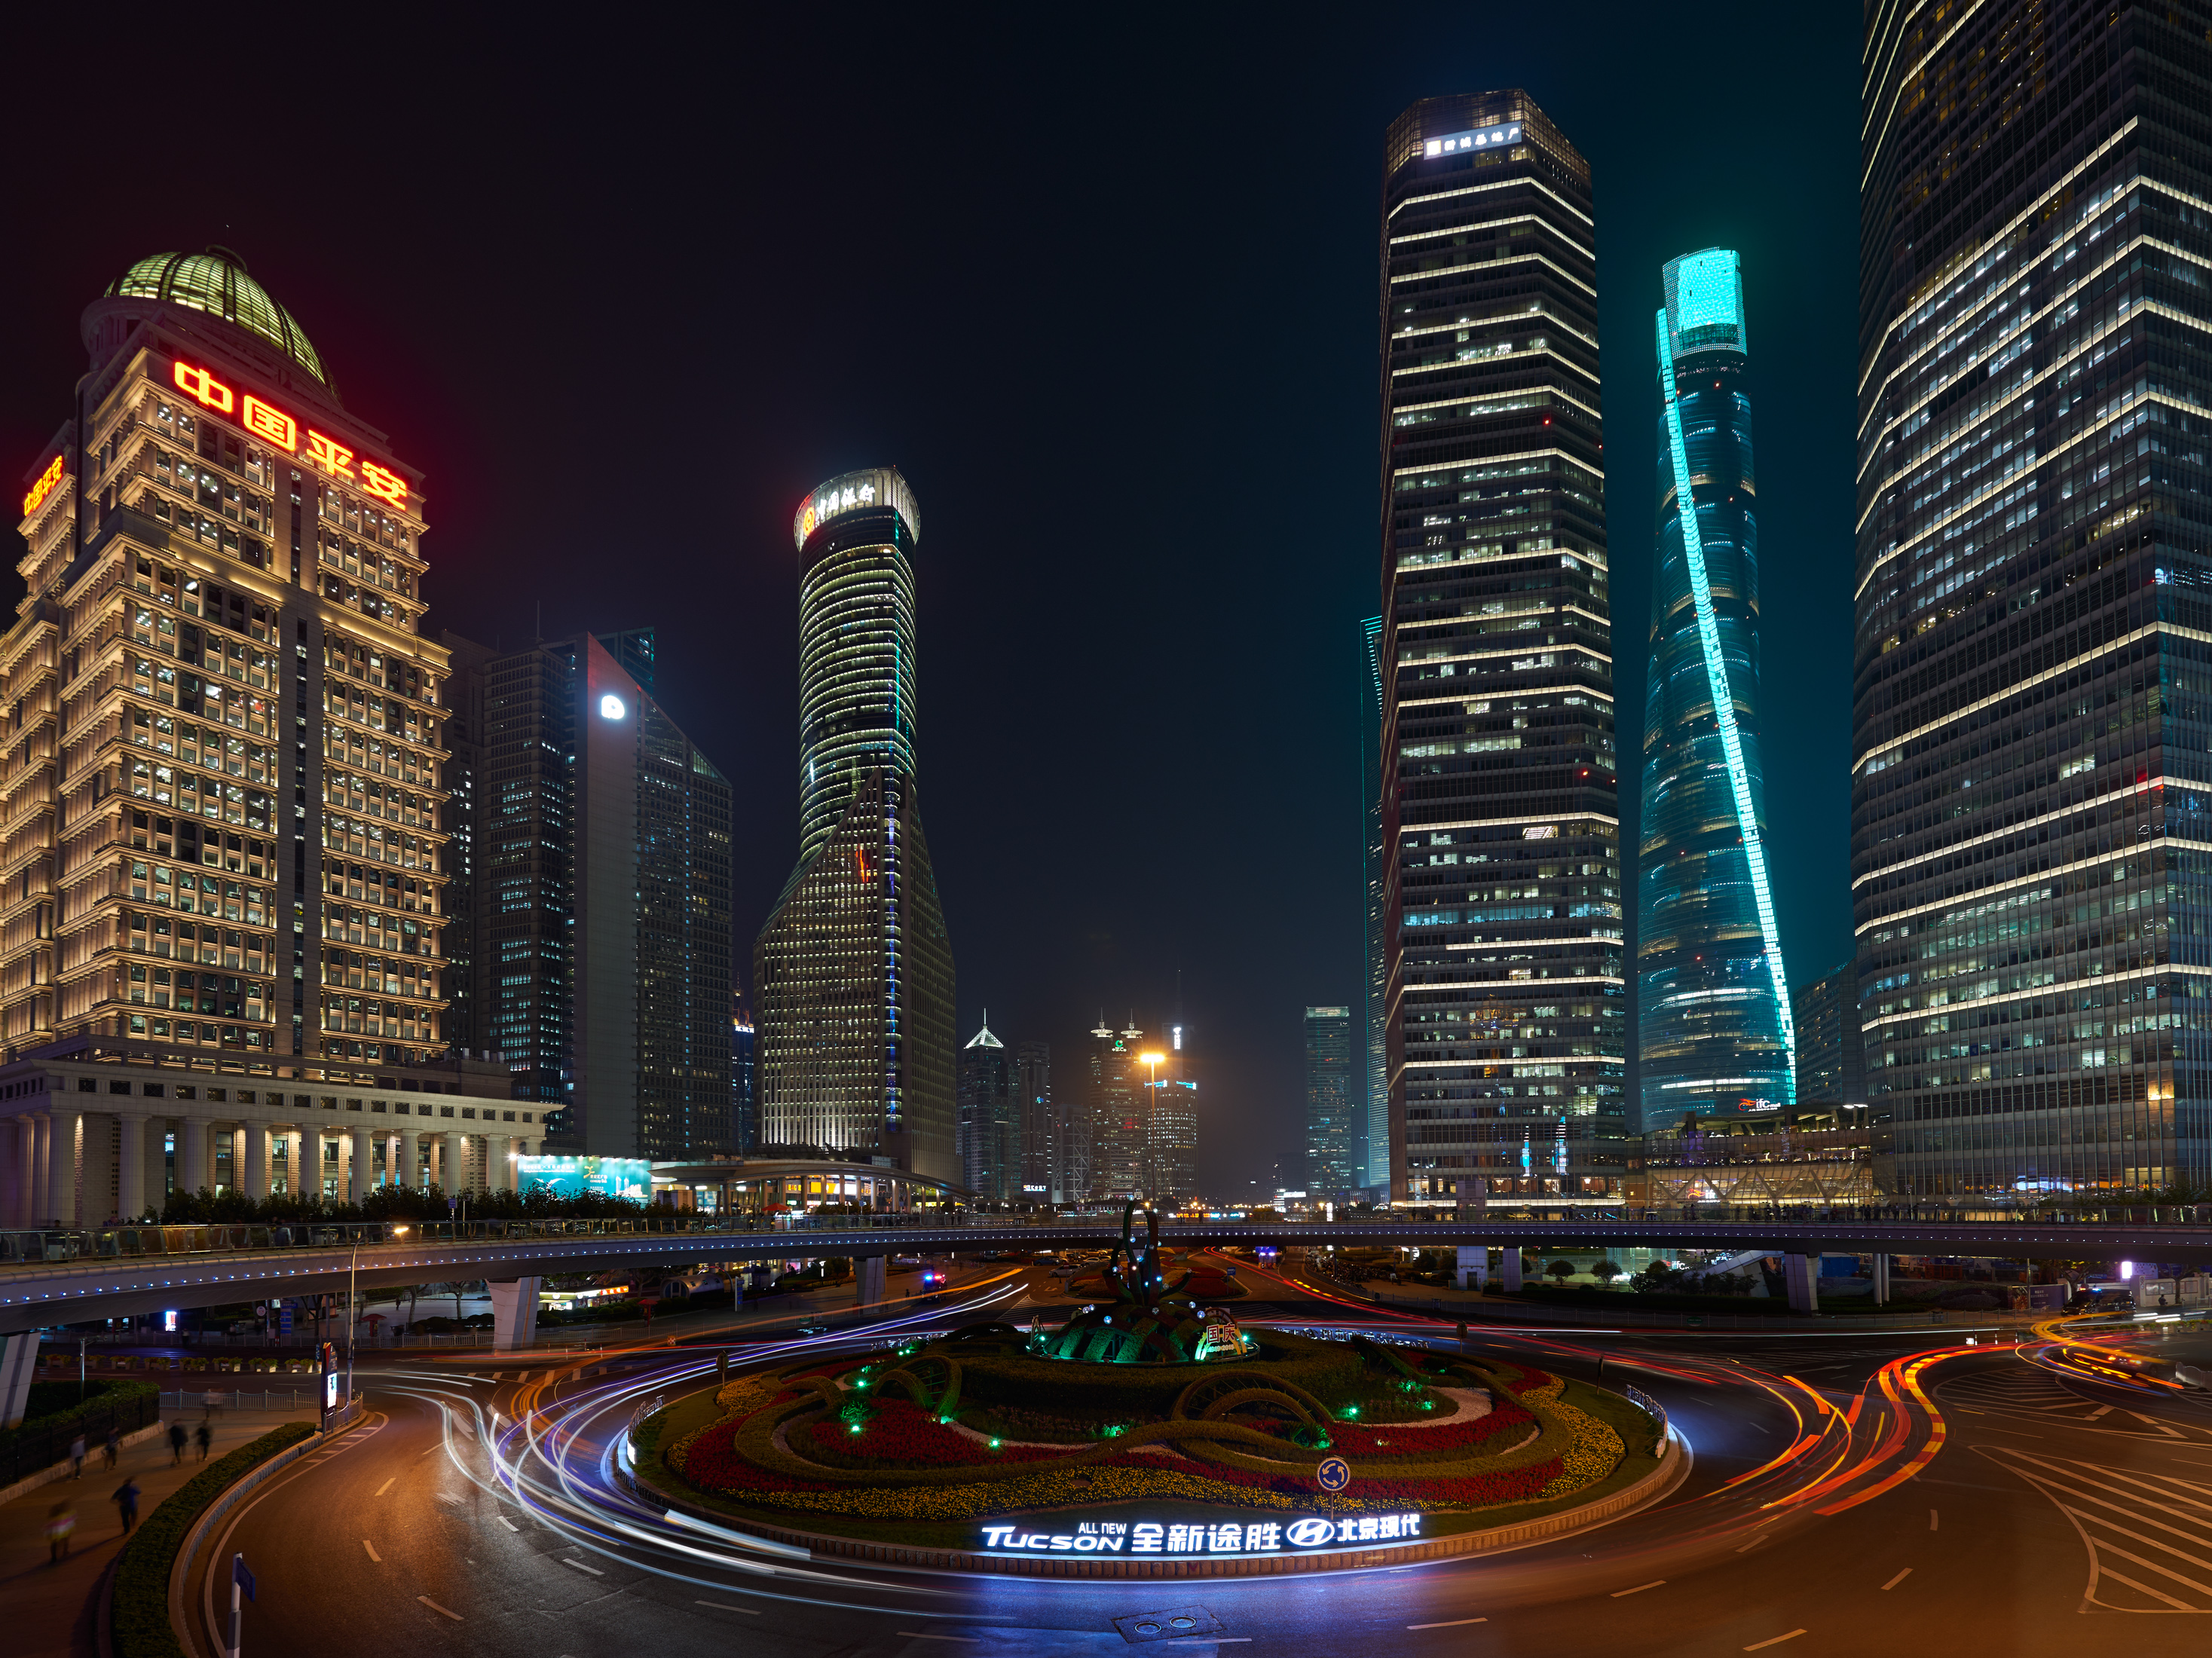
Another application of focus stacking is available-light photography. In the second example I used a long exposure to obtain the light streaks in the traffic circle. At f/16, a considerable loss of pixel acuity resulted in the background. A second image at f/5.6, focused at the first row of high-rise buildings allowed to recover the resolution and reduce noise.
Alternatively, one may wish to freeze motion in one part of the image, but still preserve a large DoF in another. Moreover, focus stacking allows the generation of images that are physically impossible with normal imaging equipment, i.e., images with nonplanar focus regions or generation of out-of-focus areas (subject isolation) when using camera phones with a small image sensor, bokeh for the masses, so to say. An additional asset of focus stacking is to remove sharpness falloff due to field curvature and lens misalignment.
The starting point for focus stacking is a series of images focused at different planes, such that the circle of confusion on different areas in the image plane will be small enough and the final output will be considered as sharp. The key is to ensure DoF overlaps in adjacent photos of the stack. This way, no out-of-focus bands will be visible in the final composite. In macro photography this may require a focusing rail in order to limit parallax errors due to focus breathing (changing angle of view for changing focal distance). And all this requires, obviously, that nothing move; in outdoor photography this may be tricky due to wind, changing light, and moving subjects. The image of the prayer flags and Annapurna III is a case in point. As a side note; you may be surprised how fast the light changes; it is possible to see pixel-level shifts of harsh shadow edges after only a few seconds.

Focus stacking starts by acquiring raw data. In the digital age those come at no additional cost, except for some (temporary) disc space. If time permits, I also recommend experimenting with exposure and aperture bracketing. Coming from large format film, I still shoot only a limited number of scenes. But if I set up, I want to take home as much significant data as possible.
- On the tripod-mounted camera, switch to live-view and zoom to 60-100%. Check the blur radii for different depths of the focus plane. In this way establish where the focus planes should be placed for the stack.
- Check your frame for the extreme focus settings. Most lenses exhibit focus breathing, that is, a narrower angle of view at close-distance focusing. Only focusing with the rear standard of a view camera would guarantee identical perspective, magnification, and focal length.
- Shoot a reference image and check exposure.
- Set your camera to manual exposure mode, and turn off vibration reduction.
- Shoot through the stack from near to far. This will be important for depth-map stacking in the post-processing step.
Helicon Remote, ControlMyNikon and other software allows you to automatically, and more precisely, step focus by using autofocus lenses (or to control motorized focusing rails). Focus stacking, by definition is a sampling technique, which inevitably can only appear as being seamless. Therefore, a nice feature of these programs is the calculation of the focus steps as a function of the required DOF for the entire scene.
Stacking software is then required to align and blend the in-focus portions from each image in the stack. So let’s look at three of the major tools for this application: Photoshop, Zerene Stacker and Helicon Focus.
- Run the stack of files through your preferred RAW* processor. Clone your settings (shadow and highlight recovery etc.), as well as the white balance.
- In Photoshop, click File/Scripts/Load Files into Stack.
- Duplicate all layers and create a group at the bottom of your layer panel.
- Highlight all layers and click Edit/Auto-Align layers. Because of focus breathing, the single images must be scaled and realigned. Artifacts at the image border, resulting from this operation must be cropped.
- With the original layers highlighted, go to Edit/Auto-Blend Layers/Stack images. “Seamless tones and colors” will adjust color and tonality for blending.
- Highlight all the layers of the stack and right click Merge Layers.
Auto-Blend isn’t perfect and often results in wavy focus (focus banding) and edge halos, i.e., color bleeding across depth discontinuities. No stacking software can handle edge halos, because images at different focal planes are not captured simultaneously. Therefore a single ray from an object may be observed twice in the composite, which is physically impossible in one single image. A workaround is to record a matrix of focus depths and apertures, and therefore retouching is almost always required. Another need results from retouching the far-focus frame to remove blotchy blurs of moving clouds. It is here were the software tools make the biggest difference. In Photoshop one can continue along these lines:
- Put the stacked image into the bottom layer
- Zoom to 60-80% and search for artifacts (wavy focus), edge halos etc.
- Make the non-blended, duplicate layers visible one-by-one and check which layer has the correct sharp focus for the affected area.
- Select the Eraser Tool (opacity and flow at 100%) and erase as much of the artifacts as possible. Merge the two layers you have been working on.
- Repeat this process for the remaining layers.
The advantage of Photoshop is that single layers can be edited independently, for example, applying additional sharpening and exposure compensation for combined focus and exposure blending.
If you already own Photoshop, experiment with short stacks to see the results, but if you are serious about focus stacking, you may very soon be annoyed about the speed of the stacking process in Photoshop**.
Although the user interface looks a bit amateurish, the retouching process is made considerably easier in Zerene Stacker. After selecting Stack/Align & Stack all, the blended image is displayed in a second, preview window. Go to a large magnification (zoom and shift are applied simultaneously to both windows) and search for artifacts. In the original window you can toggle between the different layers of the stack. Go to Edit/Start Retouching and a clone tool will be visible in both windows. Select the appropriate layer and start brushing.

Helicon Focus has almost identical retouch functionality, but also offers RAW workflow and remote camera control. Moreover, the user interface looks more professional and offers seamless integration with Helicon Remote. It is so intuitive that I had my first example ready after a minute.
After the stacking of the source images and fixing of artifacts, the file can be saved as DNG, and in this way the highlight and shadow recovery, white balance adjustment etc., can be done on the final stack instead of the set of captured images. To align source images, the stacking software must scale and shift images, which requires demosaicing. Helicon Focus uses the Adobe DNG Converter (free download) to demosaic RAW images.
Zerene Stacker and Helicon Focus offer depth-map, contrast weight, and the so-called pyramid method that works better for intersecting objects and crossing lines, for example in tree branches. From the artifacts I would guess that Photoshop applies a contrast-weight method but I was unable find any technical documentation.
Stay tuned for a detailed shootout and a workaround for the edge-halo effect. SR
*I assume that if you have followed me this far, your raw data is recorded in RAW format.
**A benchmark on a 2015 MacBook Pro, 2.5 GHz Intel Core i7, yields for a stack of 19 tiff images of 170 MB each: Photoshop 3 min 45 sec., Zerene Stacker 2 min 45 sec., Helicon Focus 30 seconds.