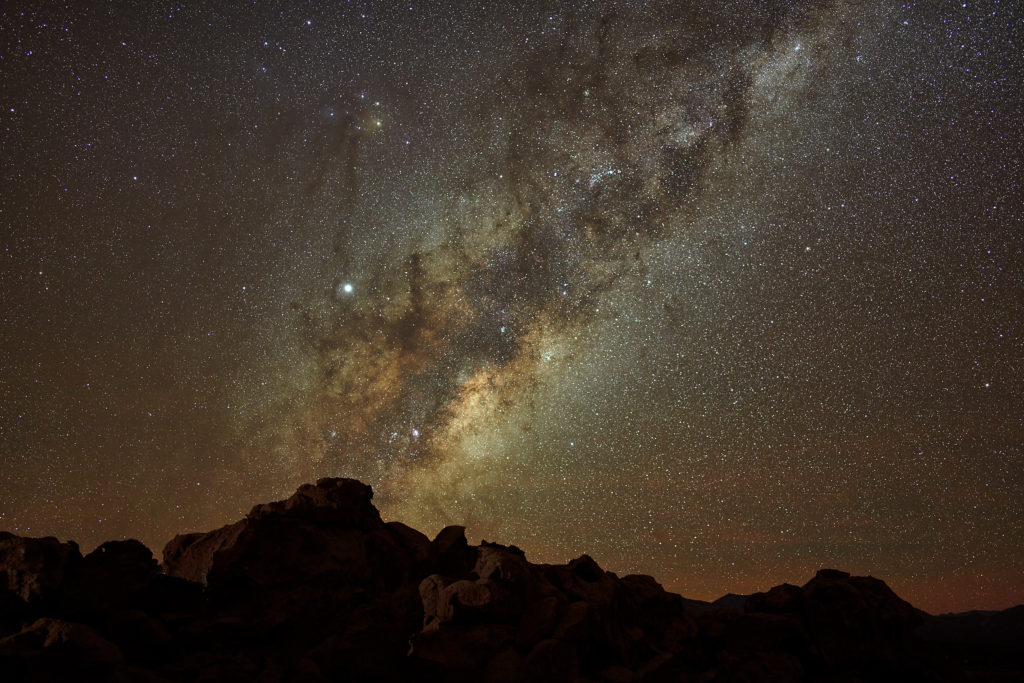
On a recent trip to the Altiplano of Bolivia and Chile, I took along a star tracker. This was appropriate for a place, world famous for deep-sky astronomy, star gazing, and night-sky photography. The air is dry (at around 10% relative humidity), there is very little light pollution and the cold temperatures at altitudes above 4000 m prevent air stratification. In addition, the night sky in the Southern hemisphere contains interesting objects, such as the Magellanic Clouds and the Omega Centauri Cluster.
At this time of year (May), the Milky Way is low in the southern sky, making it possible to capture with a moderately wide-angle lens while including some elements of the landscape. These conditions occur about three hours after sunset (around 21:30 local time), which doesn’t pose a threat to dinner or bedtime. And finally, Jupiter and Saturn are at nice positions with respect to the Sagittarius cloud (the Galactic Center) of the Milky Way.
Aligning the sky tracker with the Southern celestial pole causes some problem though, because Sigma Octantis is a very faint star (magnitude 5.4), barely visible to the naked eye and impossible to track through the polar scope. Therefore, I set up the tracker with a compass and an inclinometer at 23 deg., which yielded satisfactory results within 60 sec exposure times at 20-28 mm focal lengths.
A common rule of thumb to figure out your maximum shutter speed for sharp stars when no tracker is used is to divide 500 by the focal length; the 500 Rule. This number depends somewhat on the sensor size, but we have no more than 20 sec for the 28 mm lens.
Having captured the scene, the question arises how to post-process the image. Digital camera sensors are more sensitive to color at low luminance levels than the human eye. Many photographers set the color balance to fluorescent and render the sky dark blue to black, which reflects the perceptual human vision, which is also reflected by the color palette of the aboriginal art of the Milky Way.
But what do we want to show? Notice that I am not talking about the false-color images that render the narrow lines in the infrared spectrum. Do we want to show the perception, or a more objectively accurate rendering based on the emitted light? It is indeed possible to verify the hues based on the colors of bright stars that we can detect with the naked eye after a sufficiently long adaptation of the night vision.
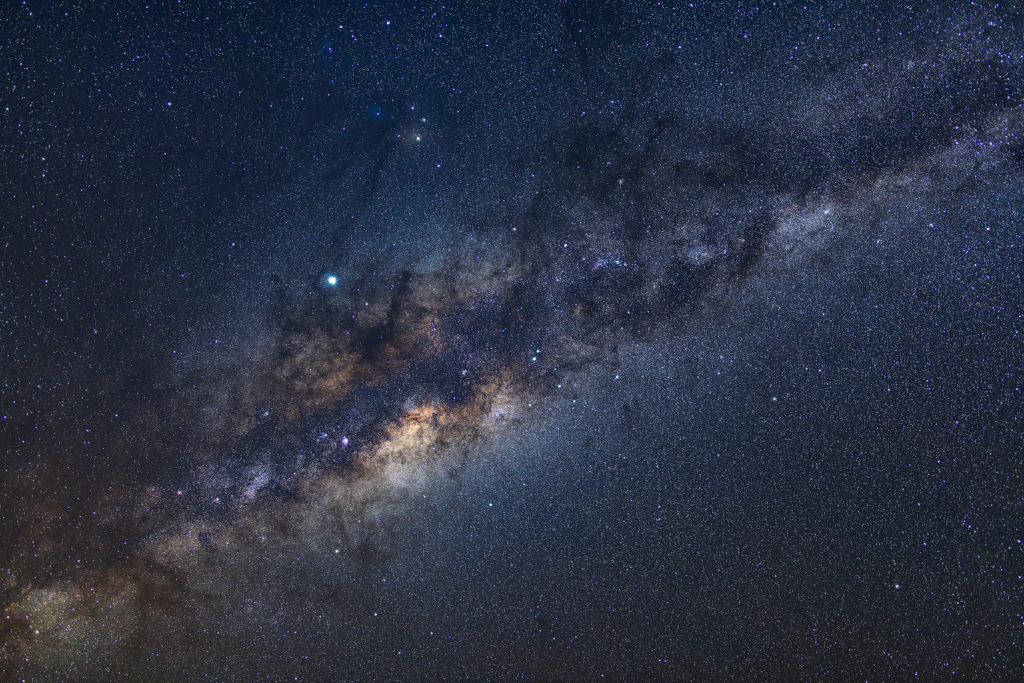
In a moonless sky (where there is no Rayleigh scattering), the clouds of the Milky Way are reddish brown, and the stars have colors ranging from magenta, red, and orange to bluish white. The true colors of stars are known from their spectra and the spectral response of the human eye. Let us take, for example, Antares, a relatively bright star of spectral type M1.5. It doesn’t appear blue to our eyes. The spectral class M (containing lines from oxide molecules in the visible part of the spectrum) corresponds to a light-orange to red appearance under daylight illuminant D65 and to a color temperature* of 2400–3700 kelvin (K). The Sun (and, consequently, the planets such as Jupiter) is at around 5800 K.
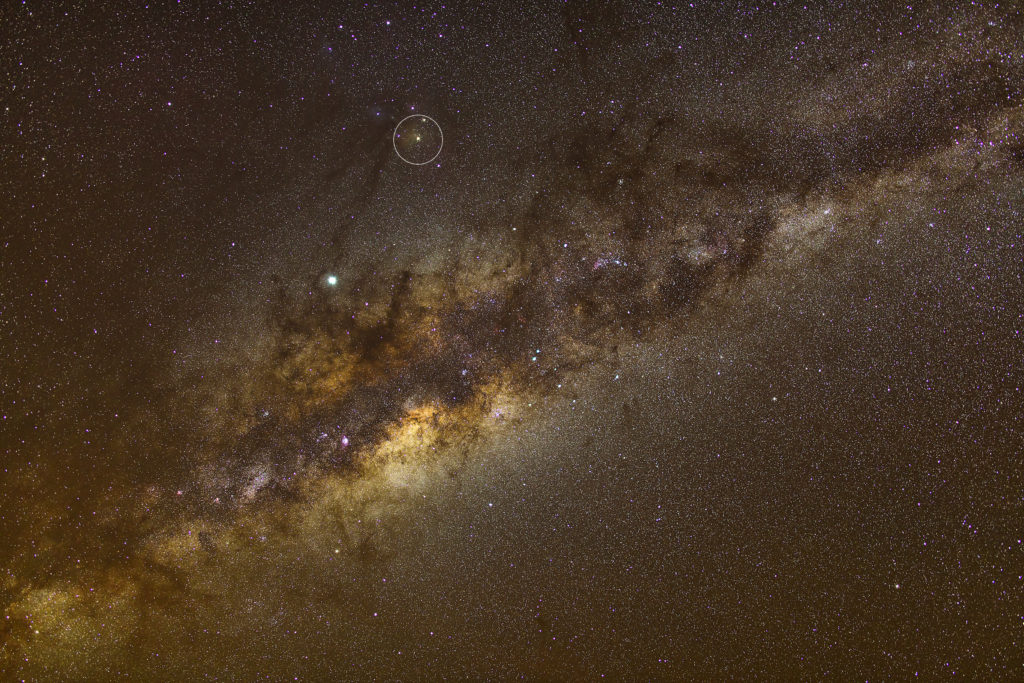
Color temperatures over 6000 K are bluish (cool), while those below 3000 K are yellowish (warm, analogous to the radiated heat flux of traditional incandescent lighting). The fact that warm lighting in this sense has a lower (cooler) color temperature, and that a low white-balance setting renders the output bluish, may lead to confusion. Since most light sources do not resemble blackbody radiators, white balance uses a second variable in addition to color temperature: the green-magenta shift (hue). The hue in the night-sky images can be checked against the clearly visible stars in the Sagittarius cloud of the Milky Way, which are faintly magenta.
There are a few other light sources in the night sky that we must consider.
- Airglow from oxygen and hydroxyl emission in the upper atmosphere of Earth. This causes the night sky to never be completely dark; it’s the same colors as the polar aurora. At high levels, red; below 100 km, green. Photographs taken from the ISS show this clearly.
- Light pollution reflected by atmospheric aerosols (generally orange, around 3000 K).
- Zodiacal light, that is, sunlight scattered by interplanetary dust. Blue-gray.
- Light from so-called emission nebulae, i.e., magenta, and intense pink seen in the Large Magellanic Cloud.
Putting it all together, a “sunny” light balance is a good starting point for the RAW processing of night-sky images. It requires some tweaking of the hue to bring out the airglow and faithfully render the light pollution. Everything else is perhaps art, but not science.
I feel more at home in the latter discipline. SR
Gear used: Nikon D850, Nikon 28 f/1.4 G, Nikon 14-24 f/2.8 G, Sky-Watcher Star Adventurer
*According to Wien’s displacement law, which states that the wavelength of the peak of the blackbody radiation spectrum yields a measure of the color temperature (724 nm, a medium red, corresponding to 4000 K).
**This is only true on average, because Jupiter’s gaseous atmosphere with its clouds of ammonia are quite varied in color.