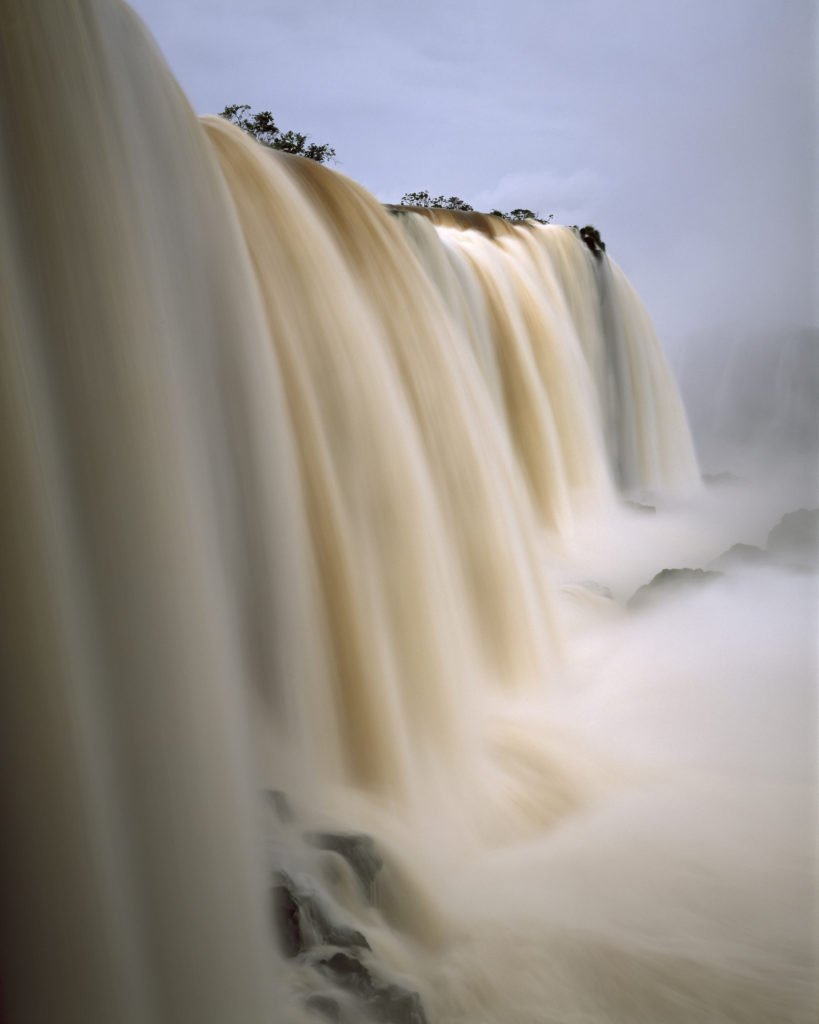
Iquacu falls. Fuji Velvia 50, f/32, 2 seconds. No ND filter needed.
Neutral density (ND) filters reduce the amount of light that enters the lens. ND filters are often used to achieve motion-blur effects with slow shutter speeds, blurring water or cloud motion, reducing depth of field in very bright light (when 1/4000 or 1/8000 of a second is not short enough for the large aperture), or to reduce the visibility of moving persons.
With high-resolution digital sensors, where image degradation due to diffraction overturns the positive effect of larger depths of field already at apertures of f/5.6 to f/8, it is not recommended, or even possible, to stop down to f/32 and beyond. This used to be my working apertures on the large-format film cameras so the problem was rather unintentional motion blur.
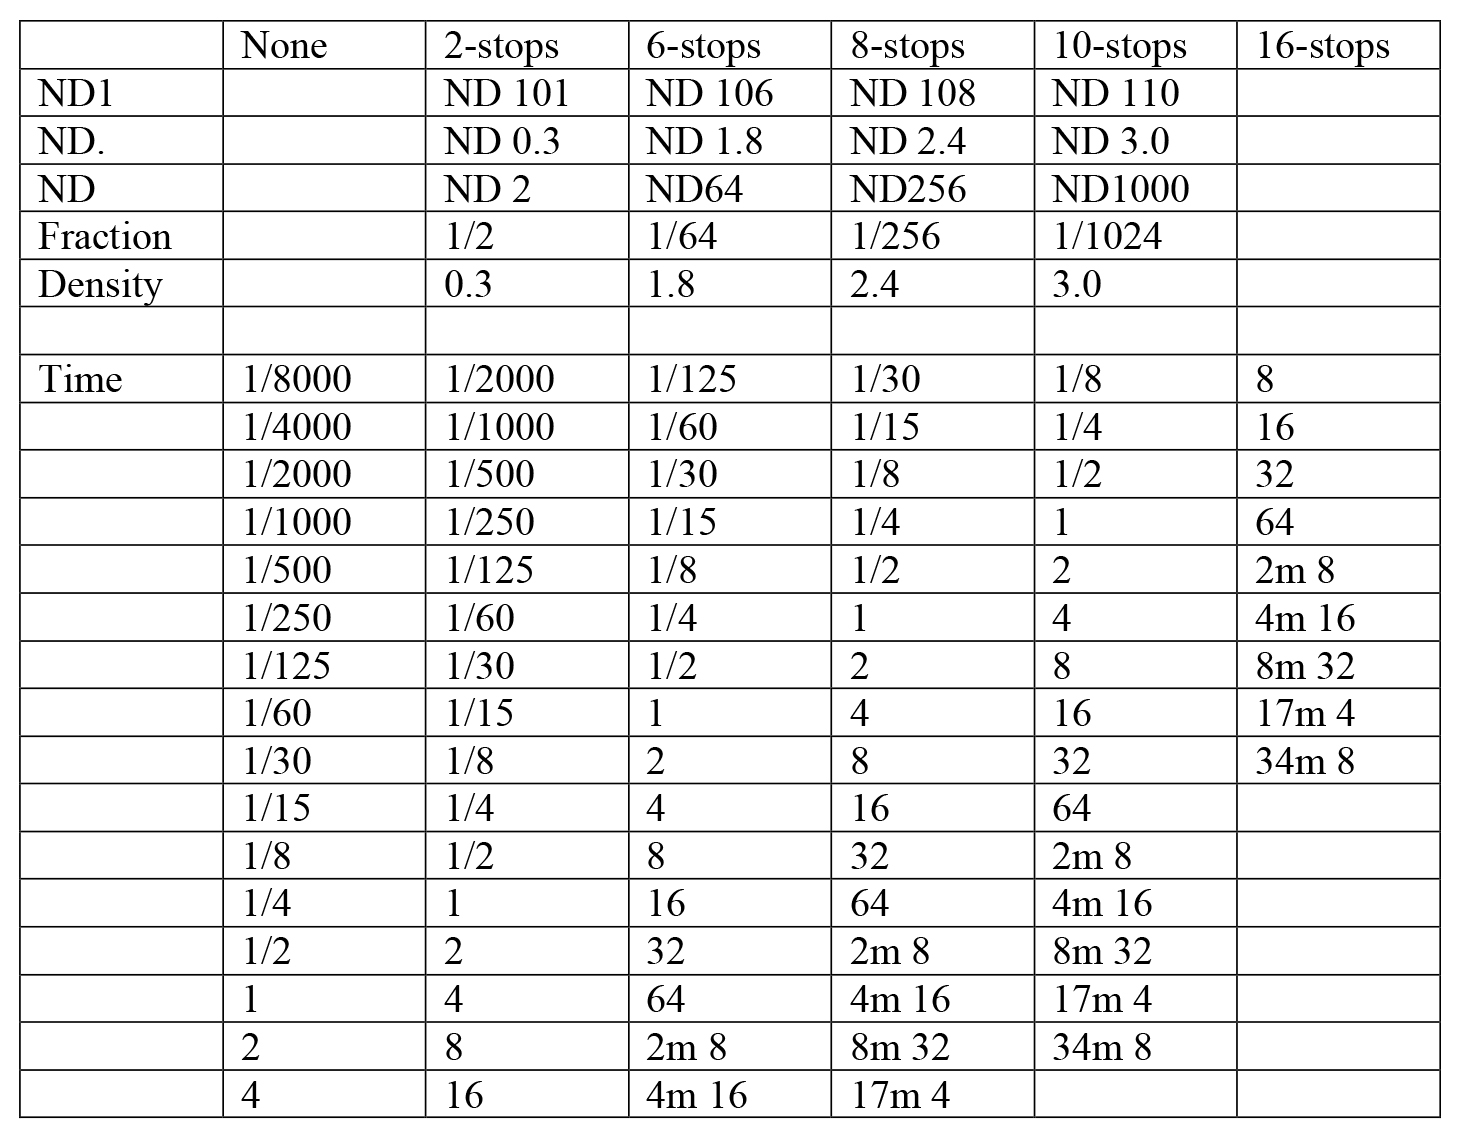
Shopping for ND filters, you will get confused about the filter ratings, because they are characterised by their optical density, f-stop reduction, transmittance, or fractional transmittance value, as the case may be.
The notation ND101, ND102, … , ND110, etc. refers to 1, 2, and 10 f-stop reductions. ND 0.3, ND 0.6, ND 3.0, etc. indicate the optical density (d) where the fractional transmittance is given by the equation I/I_0 = 1/10^d. As an example, 1/10^0.3 is 0.50119 which corresponds to a one stop reduction. B+W actually uses both filter strength and optical density to specify the strength of their filters. The third rating, used by Hoya, and denoted ND2, ND4, … , ND64, … , ND1024 (ND1000) etc., indicates the fraction of the entrance pupil (or the light reduction factor). For example, the light reduction factor is 1/4 for ND4 (2 stops) and 1/64 for ND64 (6 stops) filters.
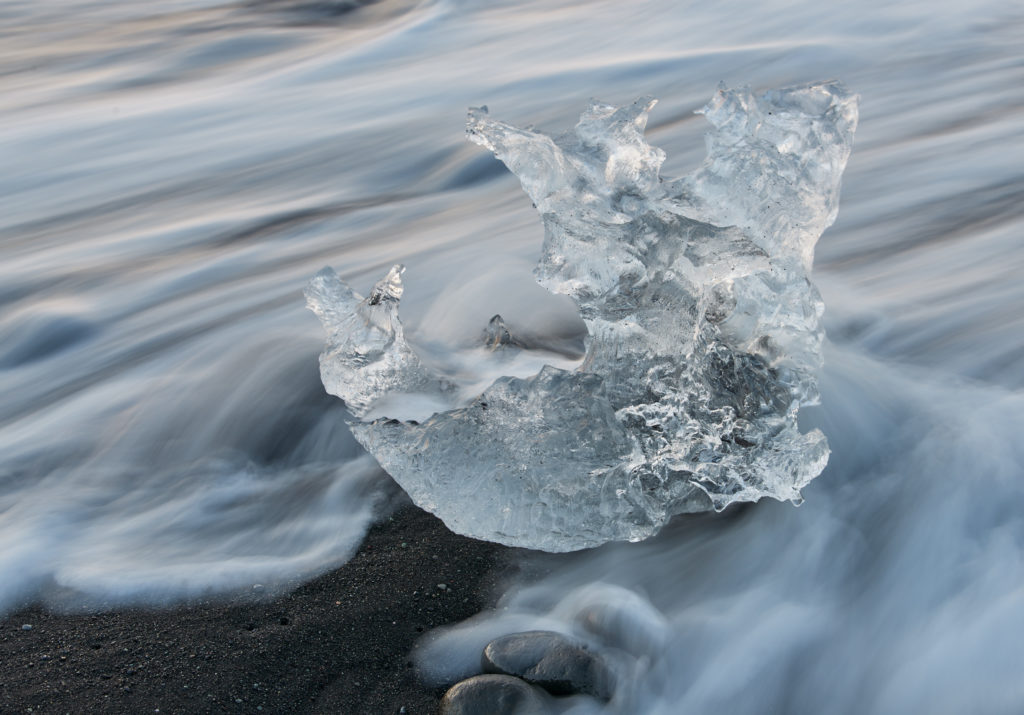
Jökulsárlón Glacier Lagoon, Iceland. Nikon 70-200 f/2.8 at 86 mm, f/11, 0.3 sec., ISO 64, 6-stop ND filter.
If you plan on taking long exposures during the day, I would suggest a set of 2, 6 and 10-stop filters. The latter be stacked together to produce a total of 16-stops.* I would not stack more than two filters in order to avoid vignetting. A good ND filter will reduce the intensity of all wavelengths, thus avoiding color cast. Unfortunately, this is not always the case, even though the manufacturers try to eliminate the red/magenta cast by blocking the infrared spectrum as well.
The test results of my set of three-filter set are shown in Figs. 1 (without color correction) and 2 (after correction). B+W Neutral Density 0.6, B+W 106M Multi Coated, and Haida PRO II Series MC ND1000. The 10 stop filter has a prounounced shift into the blue. Even corrected by using the grey card a loss of color separation persists. It also requires to boost saturation in post by about +15.
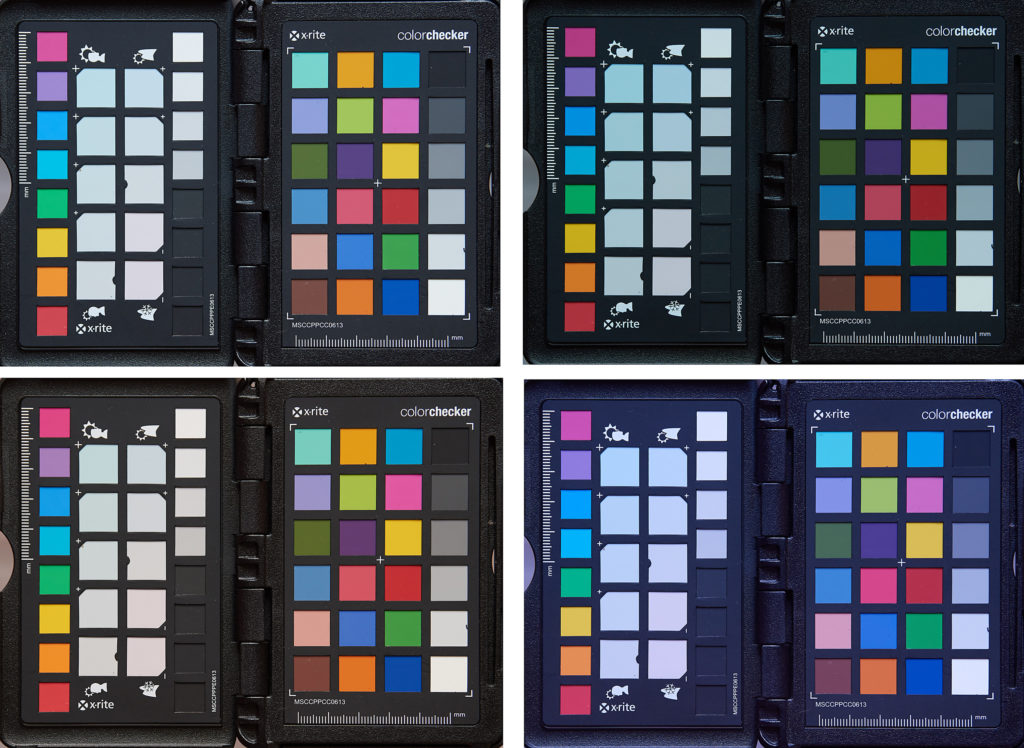
Color cast, non-corrected. Top left: No filter. Top right: B+W Neutral Density 0.6. Bottom left: B+W 106M Multi Coated. Bottom right: Haida PRO II Series MC ND1000.

Remaining color cast after correction. Top left: No filter. Top right: B+W Neutral Density 0.6. Bottom left: B+W 106M Multi Coated. Bottom right: Haida PRO II Series MC ND1000.
As long as it doesn’t get too dark, i.e., when there will be no need for an ND filter anyhow, the D810 is able to focus with the 6-stop filter at open aperture. Though in live view only, because you will not be able to see the focus point through the darkened viewfinder.
But forget about autofocus operation (both phase and contrast detection) when using 10-stop filters. The best way is to keep the filter off, acquire focus, switch to manual focus and only then mount the filter. In this way you will also have a reference for correcting the colorcast, made even easier if you include the color checker into the scene.
It may be useful to put a piece of duct tape over the focus ring to ensure it doesn’t get moved during the mounting of the ND filter. The exposure meter of the Nikon 810 (and I guess most other cameras) will get confused with the 10-stop filter on the lens (an exposure compensation of at least +3.5 has to be set). So it is faster to calculate the shutter speed using the table below and to switch to manual exposure mode. In any case you may have to set your camera to bulb mode if the exposure time exceeds 30 seconds.
To prevent any light from leaking into the camera, cover your viewfinder if the camera is not equipped with a blind. And finally check your histogram, it’s better to correct the exposure in the field; obviously. SR
* 16 stops would be enough to photograph the solar eclipse but beware that the solar telescope filters not only block visible light but also infrared and ultra-violet that may damage your sensor in live view and your retina if you peeked through the viewfinder.