
Pantheon, Paris, France
Getting rid of digital noise in a single picture often leads to a loss of image detail. Noise is traded against smudge. On the other hand, astronomers have long been using computational imaging techniques for low-noise photography. What distinguishes the approaches in this area, versus techniques used on a single exposure, is the fact that adding and averaging data reduces noise without giving up on image detail.
Averaging over a stack of images (which we will denote, in a slight abuse of the term*, as oversampling) works on the assumption that the noise in an image is purely random. Random fluctuations around the actual image data will gradually even out as one samples and averages more and more images. However, averaging does not work on images that suffer from banding noise, fixed pattern noise or hot pixels.
Of course the best way to reduce noise in an image is to let more light hit the sensor. However, the featured image (the Pantheon in Paris, France) is exactly one of the situations where this is not possible: a low-light, high-contrast situation requiring a considerable depth of field (at least f/5.6 or smaller), while the use of a tripod is forbidden or inconvenient. To obtain an exposure time suitable for hand holding of a camera without in-body or lens stabilization, one must crank up the ISO gain amplification.
Before we address the oversampling technique, we must therefore make the point on ISO invariance. High ISO setting do not increase the sensitivity (quantum efficiency) of the sensels. It simply amplifies the signal, and consequently the sensor read-out noise accordingly, before the signal is routed to the analogue-to-digital converter (ADC). However, in modern cameras the quantization noise is almost negligible against the read-out noise. As can be seen in the image samples, it therefore makes no difference whether you underexpose the image by one or two stops at an equivalently lower ISO setting and then boost the shadows in the RAW converter, or you expose “correctly” according to the meter reading. High ISO settings decrease the highlight headroom and thus increase the risk of blowing the highlights.
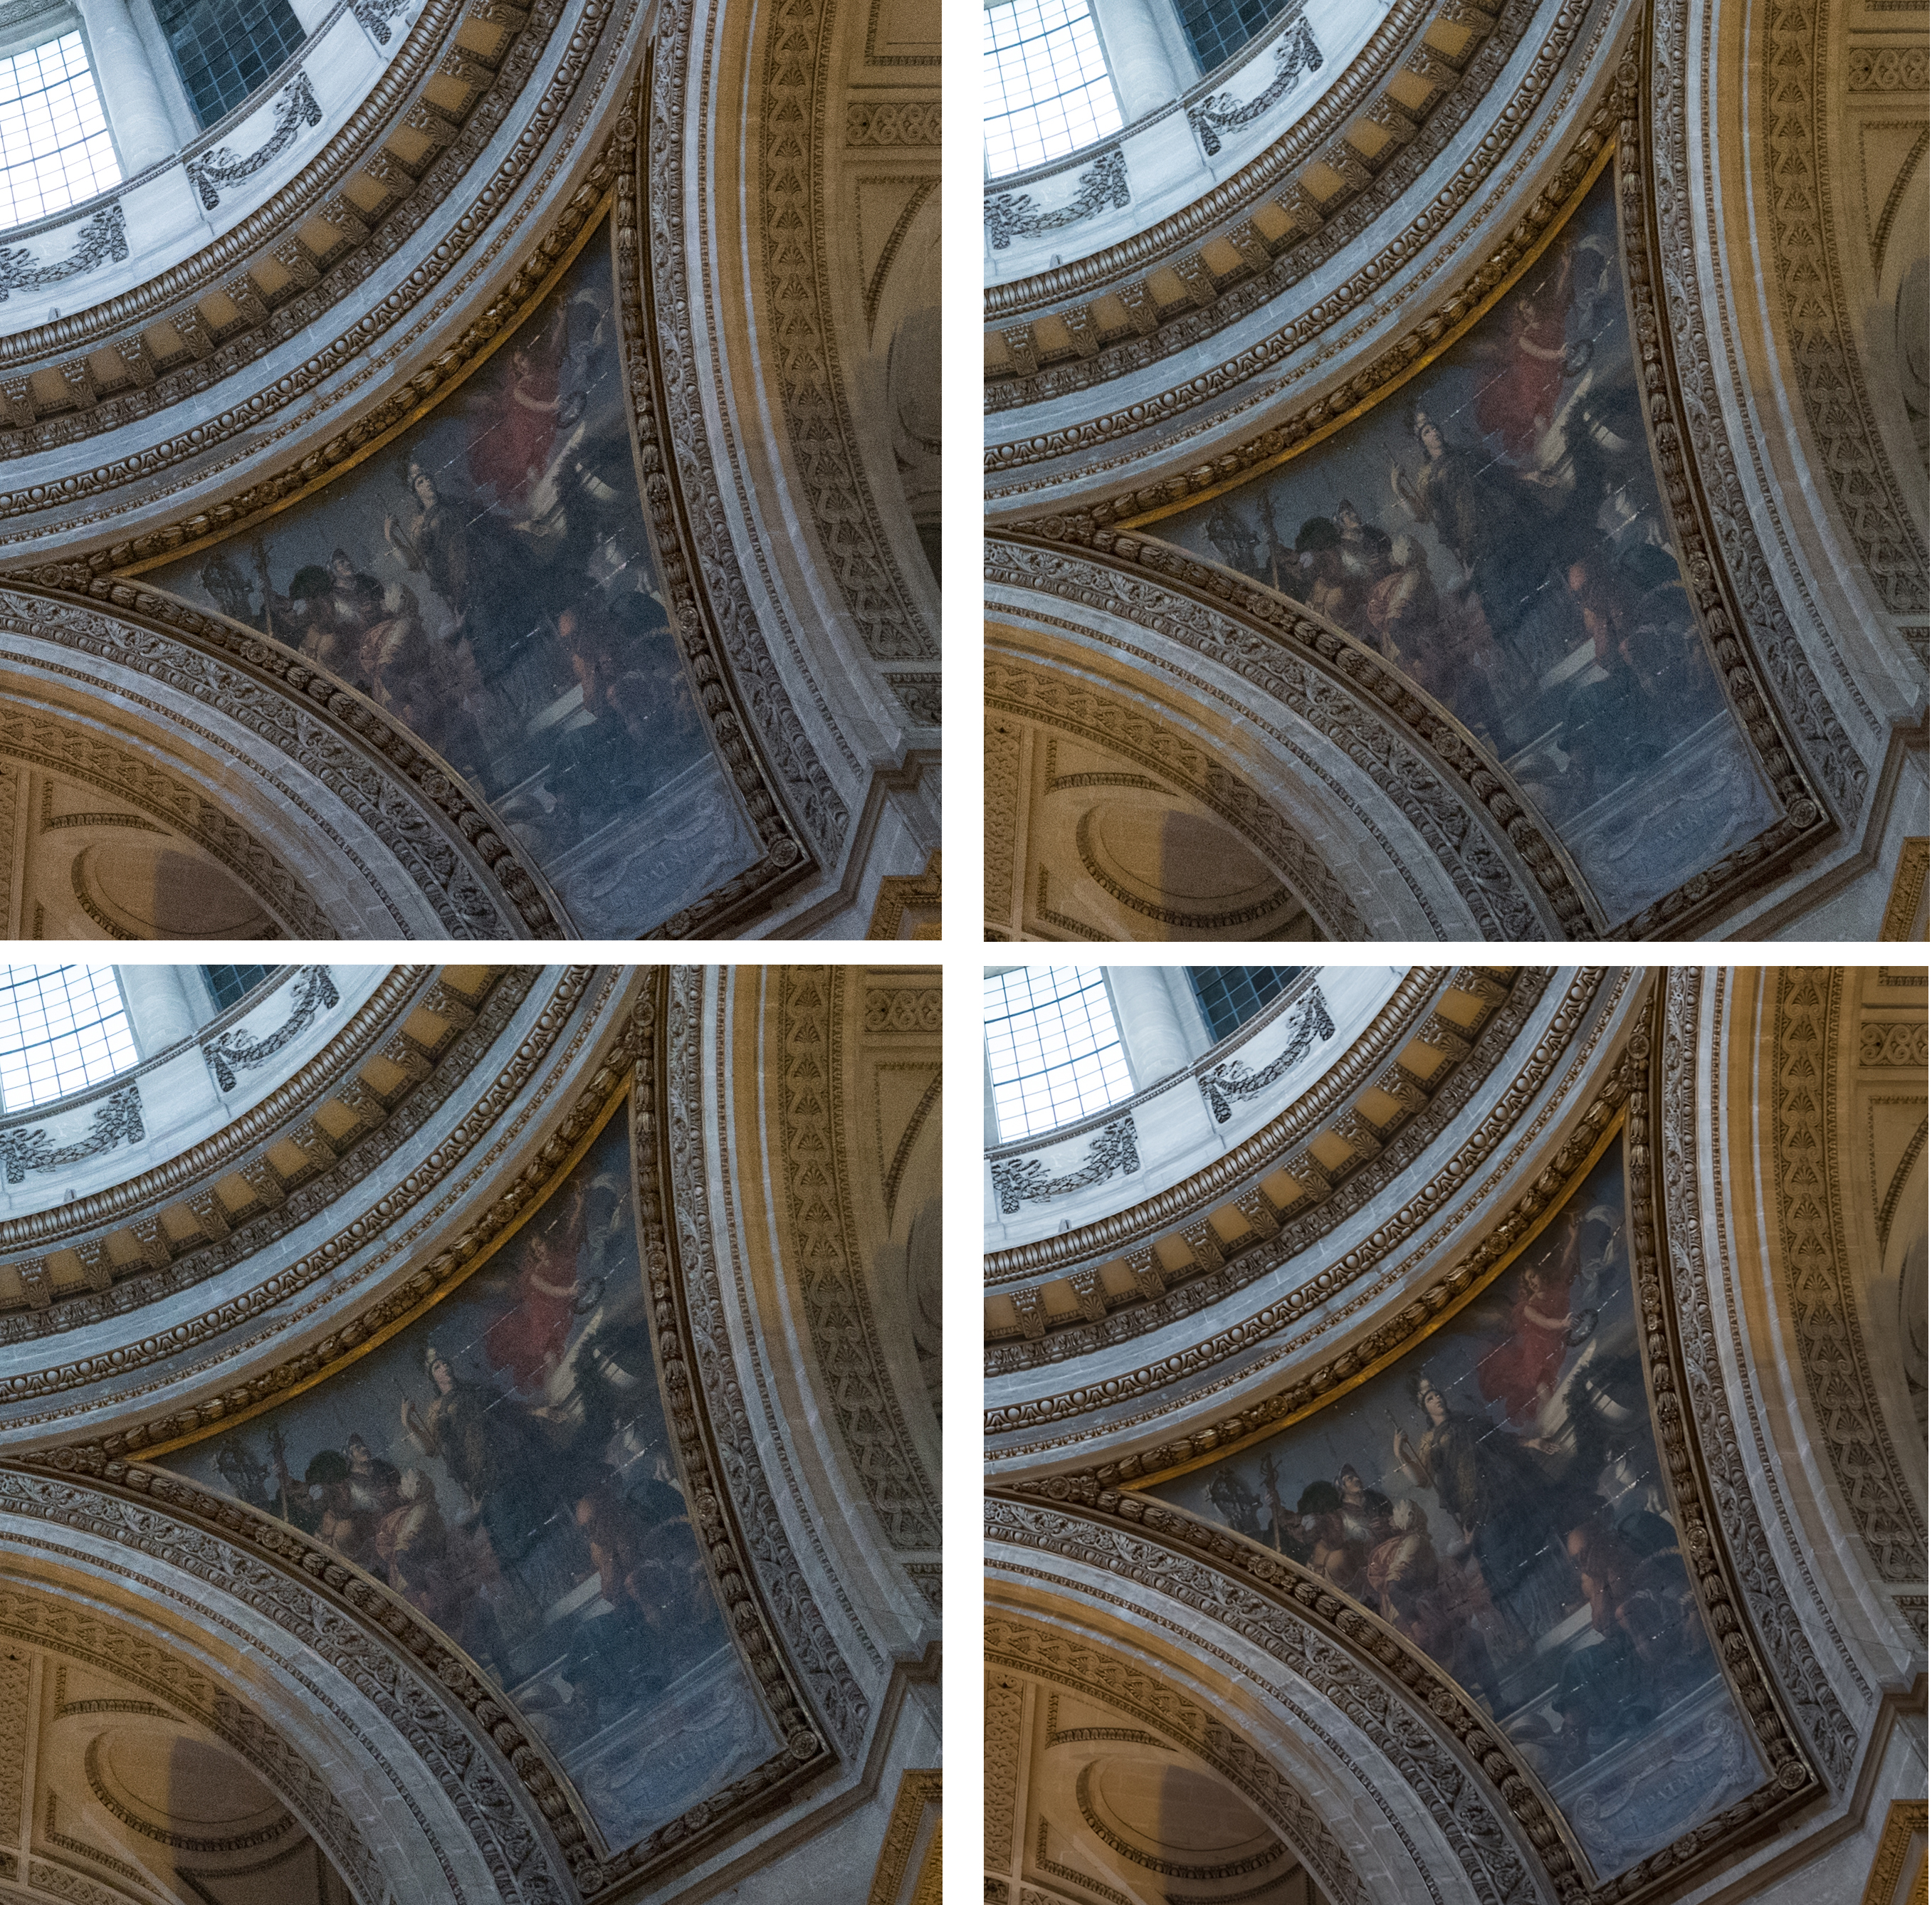
Top left: ISO 3200. Top right: ISO 1600 plus one-aperture boost in Lightroom. Bottom left: ISO 800 plus two-apertures boost in Lightroom. Notice that the noise level in the dark areas is identical in the three images. However, the highlights keep a better tonality for the ISO 800 setting. All images at 14 mm focal length, f/5, 1/80 s. Bottom right: Stack of 10 images at ISO 800 and averaging in Photoshop. Final sharpening and curve adjustment to taste. Click to enlarge (full 100% crops).
It is worth noting that oversampling doesn’t require zero camera movement between exposures. Multiple exposures may be offset by a slight amount, which can be fixed before the averaging process by aligning the layers in Photoshop.
The featured image is a composite of 10 RAW images, hand held at 14 mm focal length, f/5, 1/80 s, ISO 800, and a shadow boost of two apertures in Lightroom. Converted to 16 bit tiffs and loaded into Photoshop the procedure is as follows:
1) Choose File > Scripts > Load files into Stack.
2) Highlight all layers in the layer’s widget.
3) Choose Edit > Auto-Align Layers.
4) Crop images.
5) Choose Layer > Smart Objects > Convert to Smart Object.
6) Choose Layer > Smart Objects > Stack Mode > Mean.
7) Flatten image.
*In signal processing, oversampling is the process of sampling a signal with a sampling frequency significantly higher than the Nyquist rate at which a bandwidth-limited signal can be perfectly reconstructed. Oversampling is implemented in order to achieve a higher-resolution DAC. For example, combining 256 samples with a bit depth of 16, will increase the signal-to-noise ratio at the voltage level by a factor of 16, or 4 bits, to obtain a 20-bit resolution. In photography, oversampling would act on the sensor in front of the ADC by a pixel density that is considerably higher than the highest frequency spatial signal transmitted by the lens.